Azure Cognitive Services help to build intelligent applications without having AI or data-science knowledge. What if you want to take it even further? Building a custom image classification model and fitting your unique scenarios can be very easy with Custom Vision.
What Cognitive Services are and what is Custom Vision?
Azure Cognitive Services consist of five pillars - Vision, Speech, Language, Search and Desicion APIs. In this article we will focus on the Vision pillar. Sometimes, special use cases have to be satisfied and Vision APIs might not fit our requirements. This is where Azure Custom Vision is coming to lend a helping hand.
Custom Vision is part of Microsoft's cloud services called Cognitive Services. It allows developers to create and train an image classification model with their own data. These models can be then exported and re-used directly in their applications or even run offline on mobile devices. Combined with the rest of Vision services they can bring some nice results.
How to start
In order to use Custom Vision, an active Azure subscription is required. Payment is via pay-as-you-go model so cost will depend on your usage. Before signing in, an Azure resource called "Cognitive Services" has to be created. This can be done directly through the Azure portal or for example via the Azure CLI. After that, you should be able to start using the service on its site. For demo purposes, we will use the portal with the GUI to create and train our custom image classification model. This can also be done by API or SDK but it would surely take us a lot more time. ;)
If you want to check out the pricing model, see Cognitive Services Pricing. There is also a calculator that will help you to configure and estimate your costs - Pricing Calculator.
Model creation, training and testing
For the needs of this short post, we will teach Microsoft AI to recognize a picture of our test brand "Enso" with custom packaging on it. Our learning set will be small, but it should do the job. We will feed the Custom Vision with 15 images (minimum required) but if you would like hit bigger prediction accuracy, Microsoft recommends using at least 50 different pictures (with different angles, lighting, background etc.).
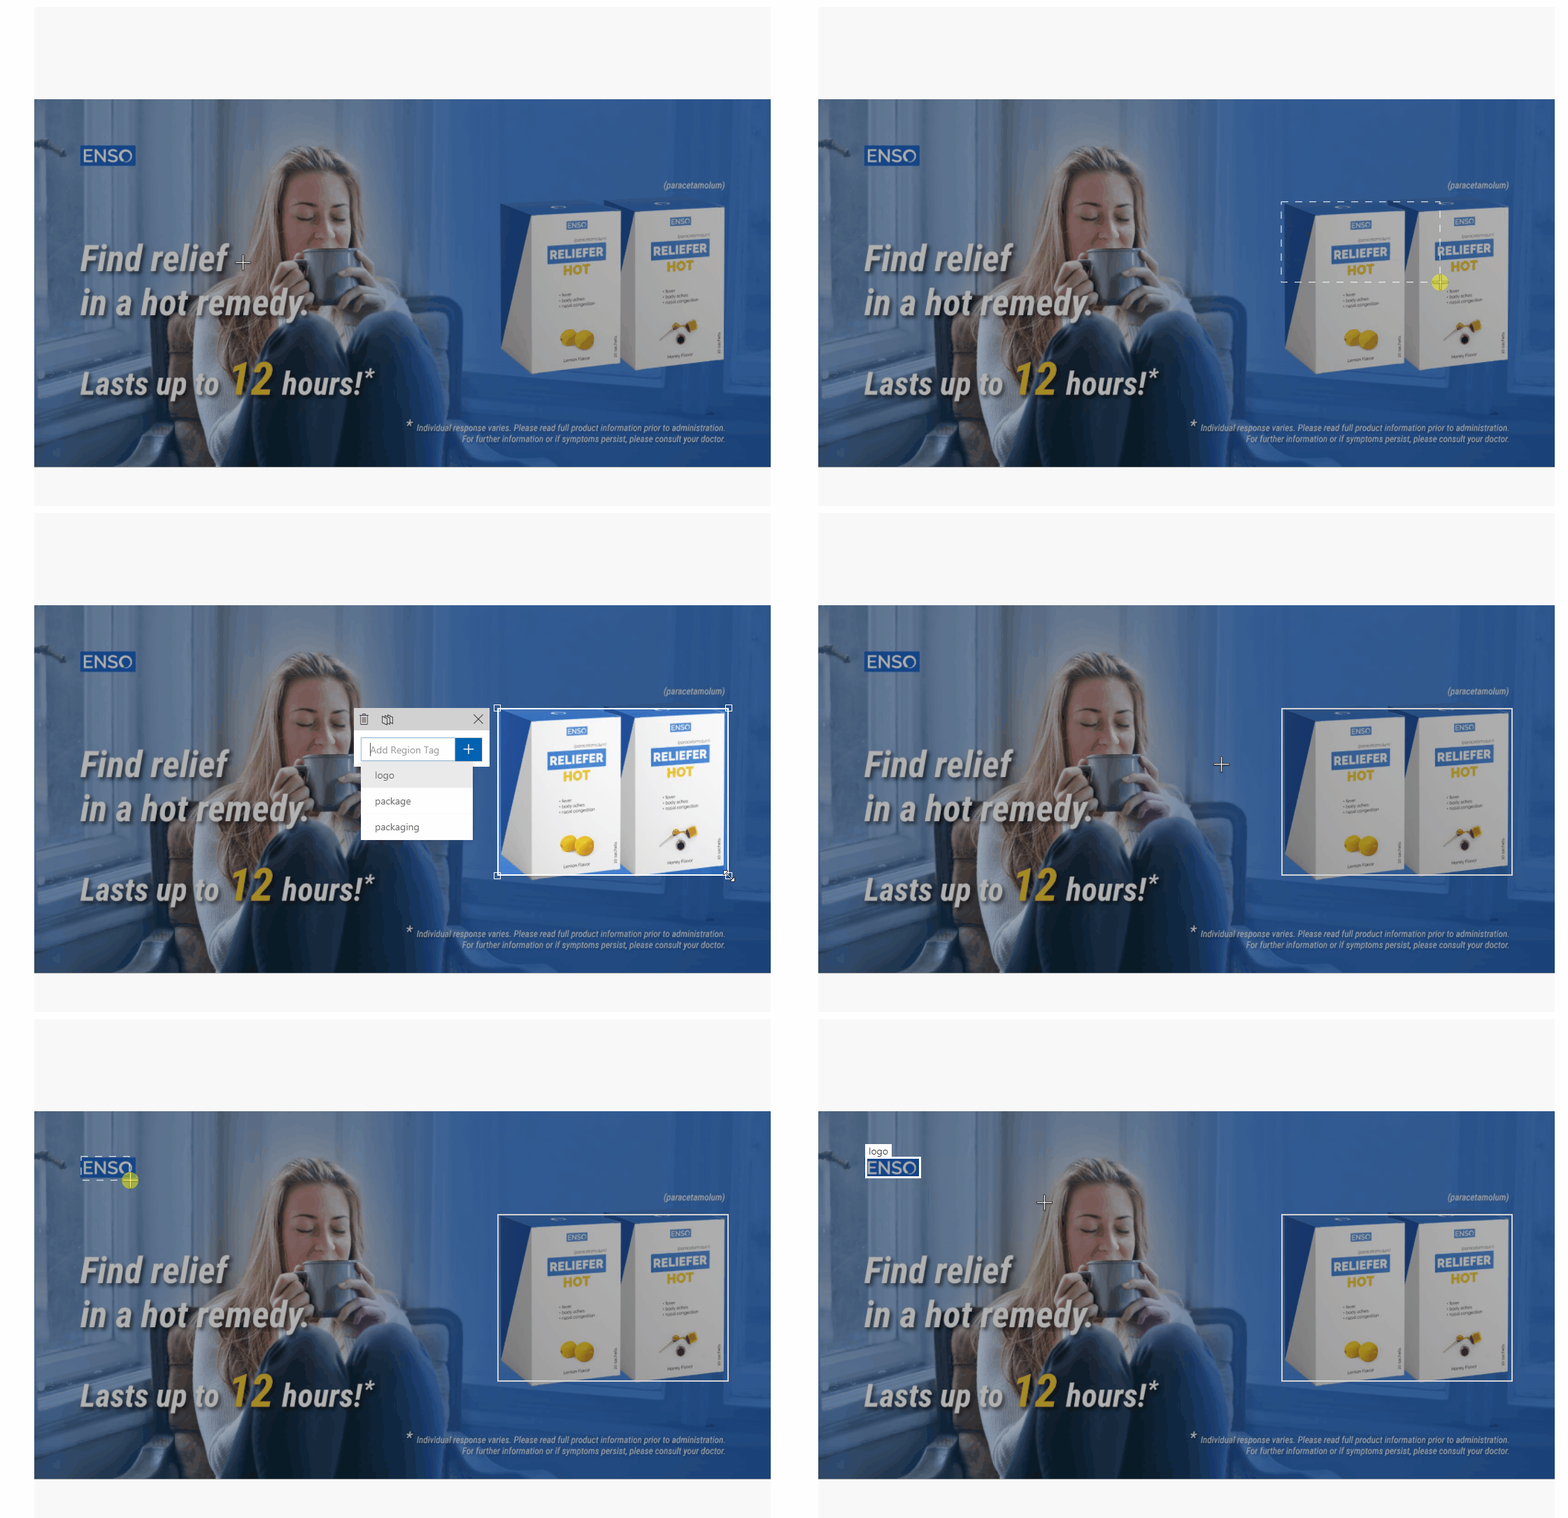
Let's start by uploading the pictures to Custom Vision and tagging them. The process is really simple. After uploading your image all you need to do is mark the desired picture area and name the tag.

Here are some pictures from our training set:

Custom Vision provides two different training types:
- Quick Training
- Advanced Training
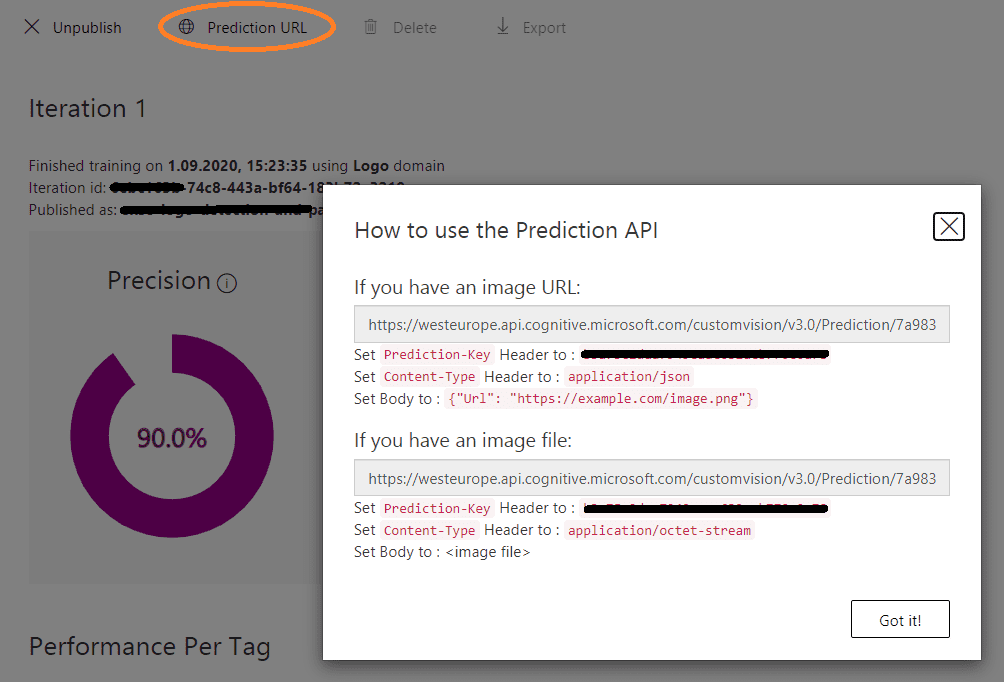
Quick type, which is ideal for our case is recommended for quick iterations. Advanced training should be used for challenging datasets and for improving performance. Additionally, the advanced option, allows you to specify compute time budget and will also identify the best augmentation settings for the trained model. Once the training finishes, the model can be published, and you should be then able to access it via Custom Vision API.
Let's see now, if our model will recognize properly a test picture. We will use one with different background but of course in a real-life scenario the pictures would be much more different, and you would probably need a bigger training set in order to have higher accuracy and precision.
On our test pictures, the package and logo have been recognized with probability of 87% and 77%. The precisions are quite good considering the fact, how small training set we had (15 different pictures).
Same result as JSON from the Custom Vision "ClassifyImage" endpoint of the Prediction API. As you can see, there are more predictions than in the GUI. This is only happening because of a filter that you can apply when you are quick testing your image. I chose to display only probabilities higher than 50%. Furthermore, through the API you can also send images for classification by pointing a URL instead of sending the image as an array of bytes - Classify from URL endpoint.
curl --location --request POST 'https://westeurope.api.cognitive.microsoft.com/customvision/v3.1/Prediction/<projectId>/detect/iterations/<model-published-name>/image' \
--header 'Prediction-Key: prediction-key' \
--header 'Content-Type: application/octet-stream' \
--data-binary test-picture.png'
{
"id": "predictionId",
"project": "projectId",
"iteration": "iterationId",
"created": "2020-09-15T07:53:56.076Z",
"predictions": [
{
"probability": 0.0125601888,
"tagId": "f93712d8",
"tagName": "package",
"boundingBox": {
"left": 0.0594686046,
"top": 0.508503,
"width": 0.054339774,
"height": 0.0431246758
},
"tagType": "Regular"
},
{
"probability": 0.878991067,
"tagId": "f93712d8",
"tagName": "package",
"boundingBox": {
"left": 0.10072951,
"top": 0.586729169,
"width": 0.347173274,
"height": 0.320659339
},
"tagType": "Regular"
},
{
"probability": 0.0101653179,
"tagId": "f93712d8",
"tagName": "package",
"boundingBox": {
"left": 0.08953144,
"top": 0.81966573,
"width": 0.2634629,
"height": 0.179630339
},
"tagType": "Regular"
}
]
}All the operations of the Prediction API can be found at Classify Image. Additionally, project creation, tagging, training and all training related stuff can be done via the Training API. More info about the training operations can be found at Create Image Regions.
Summary
As shown, Custom Vision is extremely helpful when you want to solve specific cases where other Vision APIs are not enough. Machine learning possibilities are limitless, so it's up to you what you want to achieve. It can be used basically in all real-life scenarios.
Custom Vision models can be also combined with another tool from Cognitive Services group called "Video Indexer". By using both, you can create some unique custom video processing and analysis. You can also export your model and use it offline with Tensorflow or CoreML on mobile devices.
If you want learn more about Custom Vision, visit Microsoft's official documentation.
Hero image by Pietro Jeng, opens in a new window
Featured image by Amanda Dalbjörn, opens in a new window

